
How to attach branches and plants in a chameleon enclosure
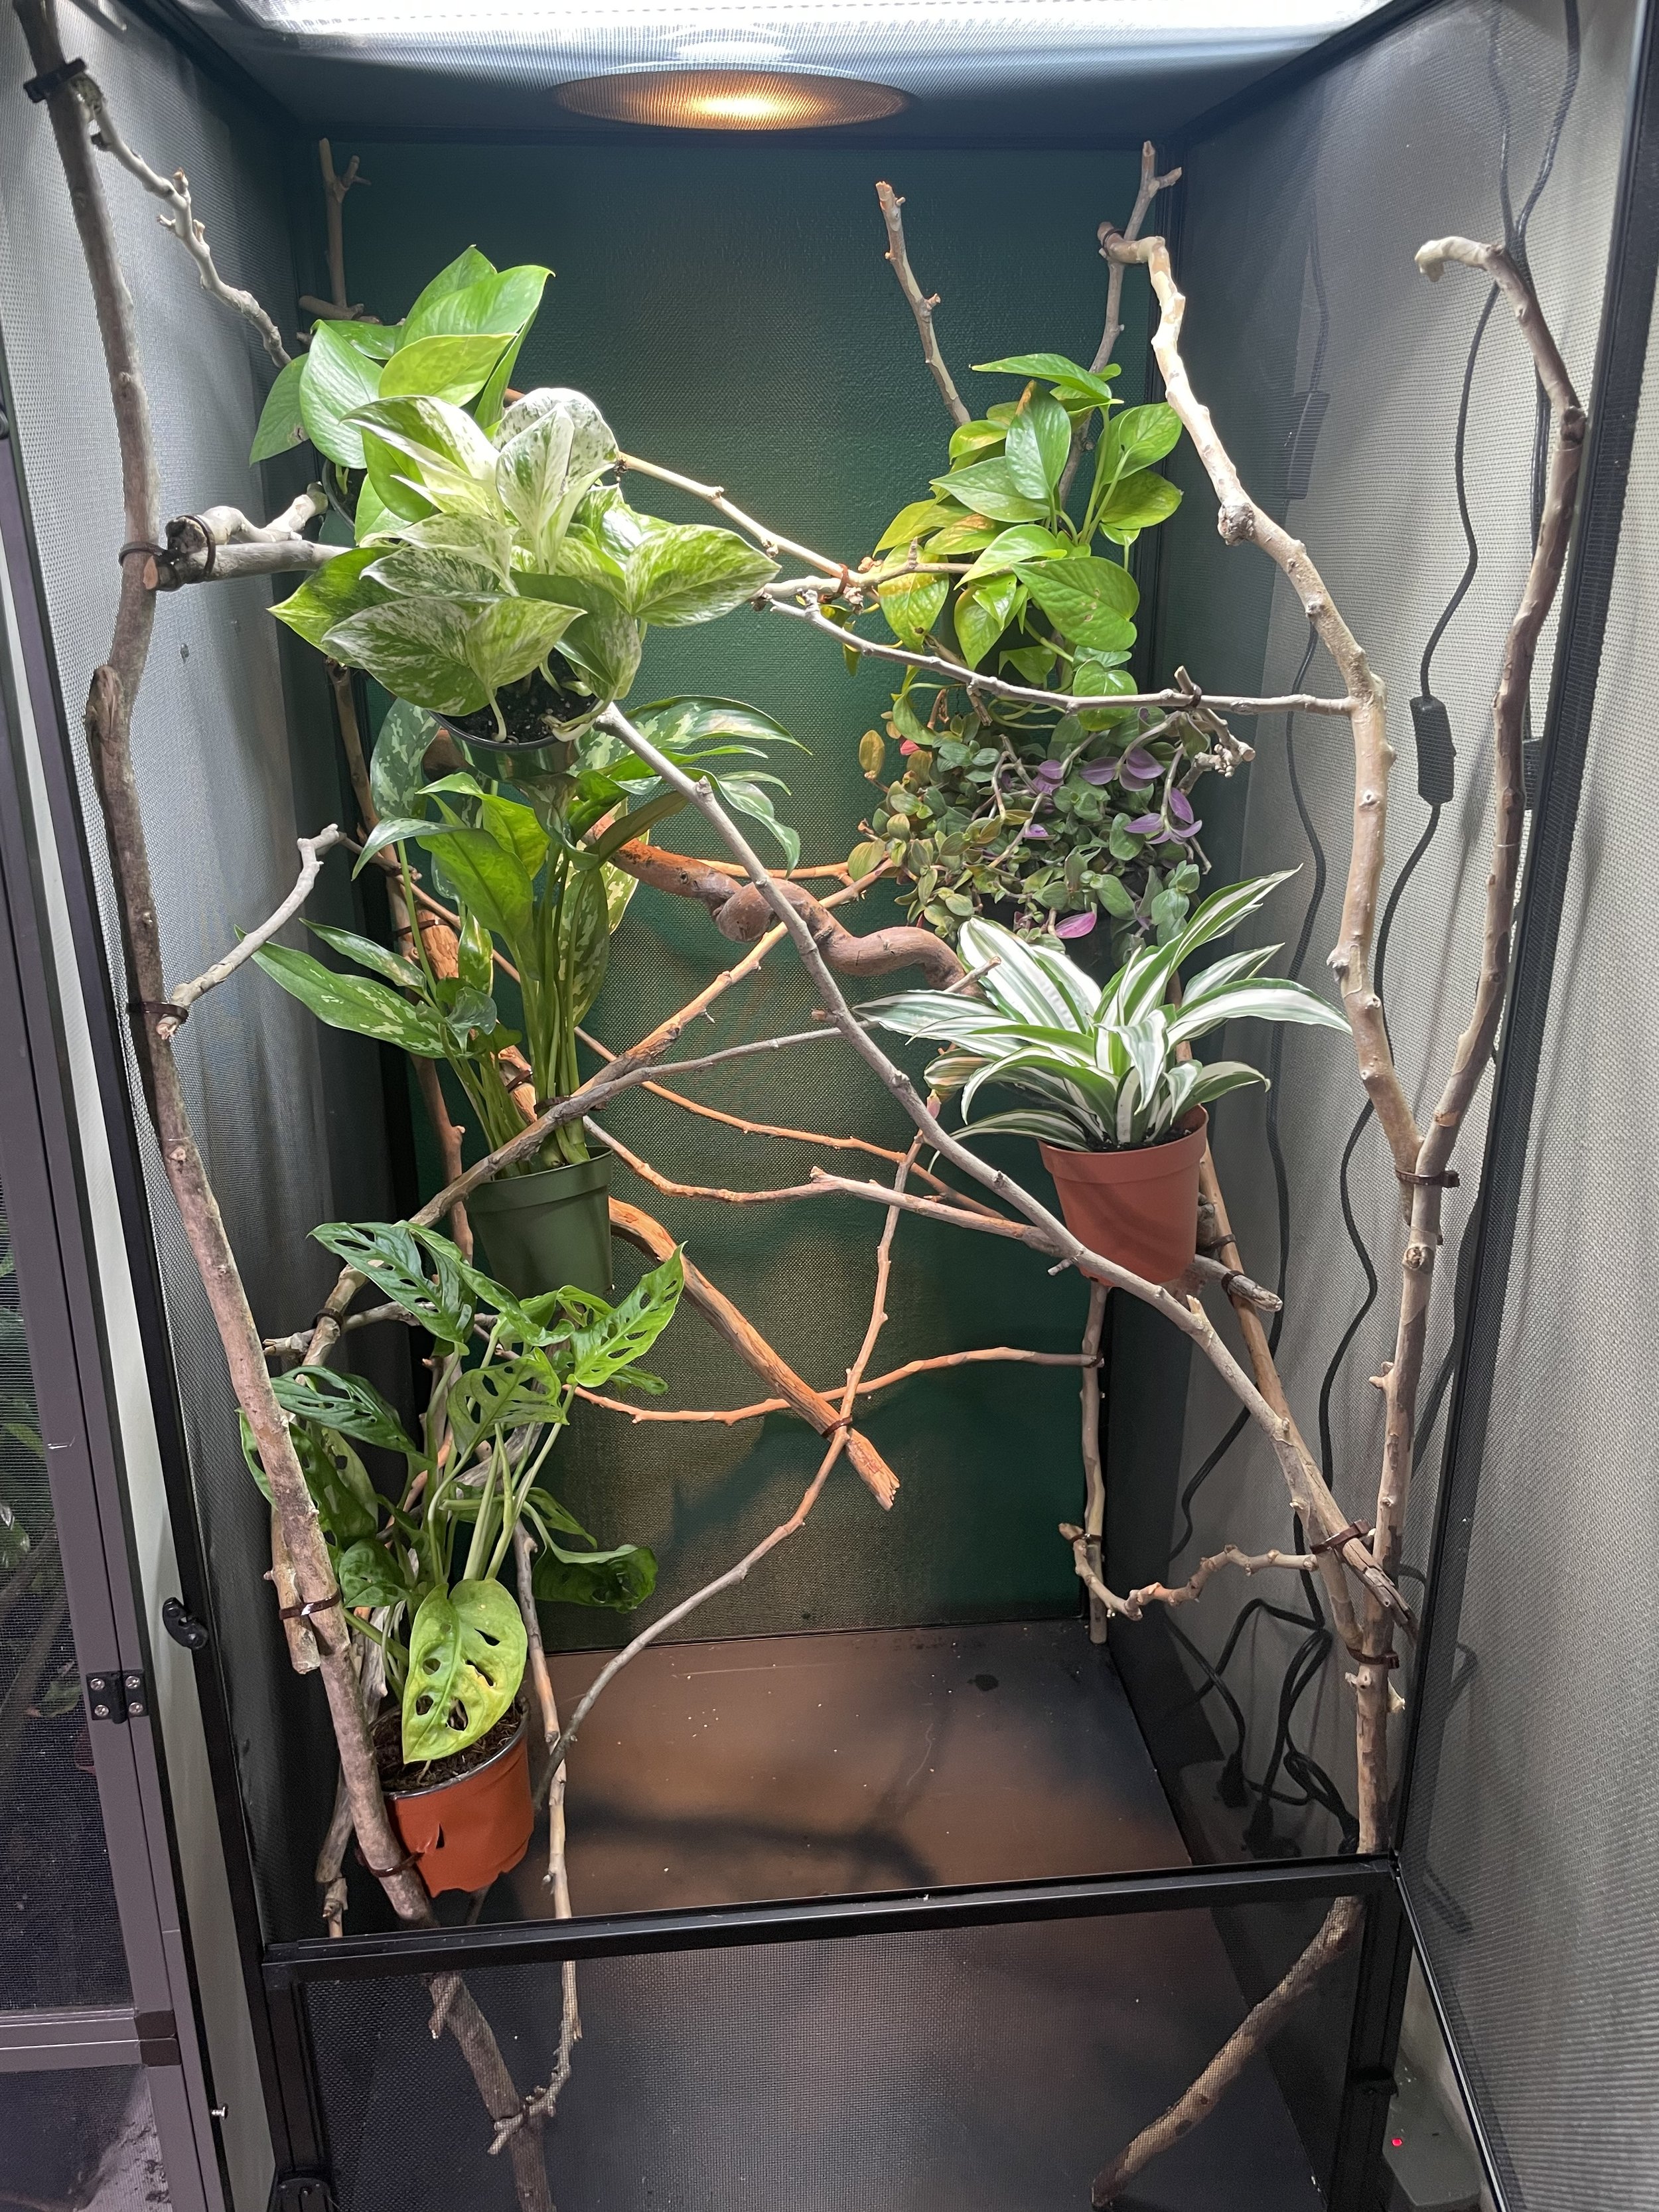
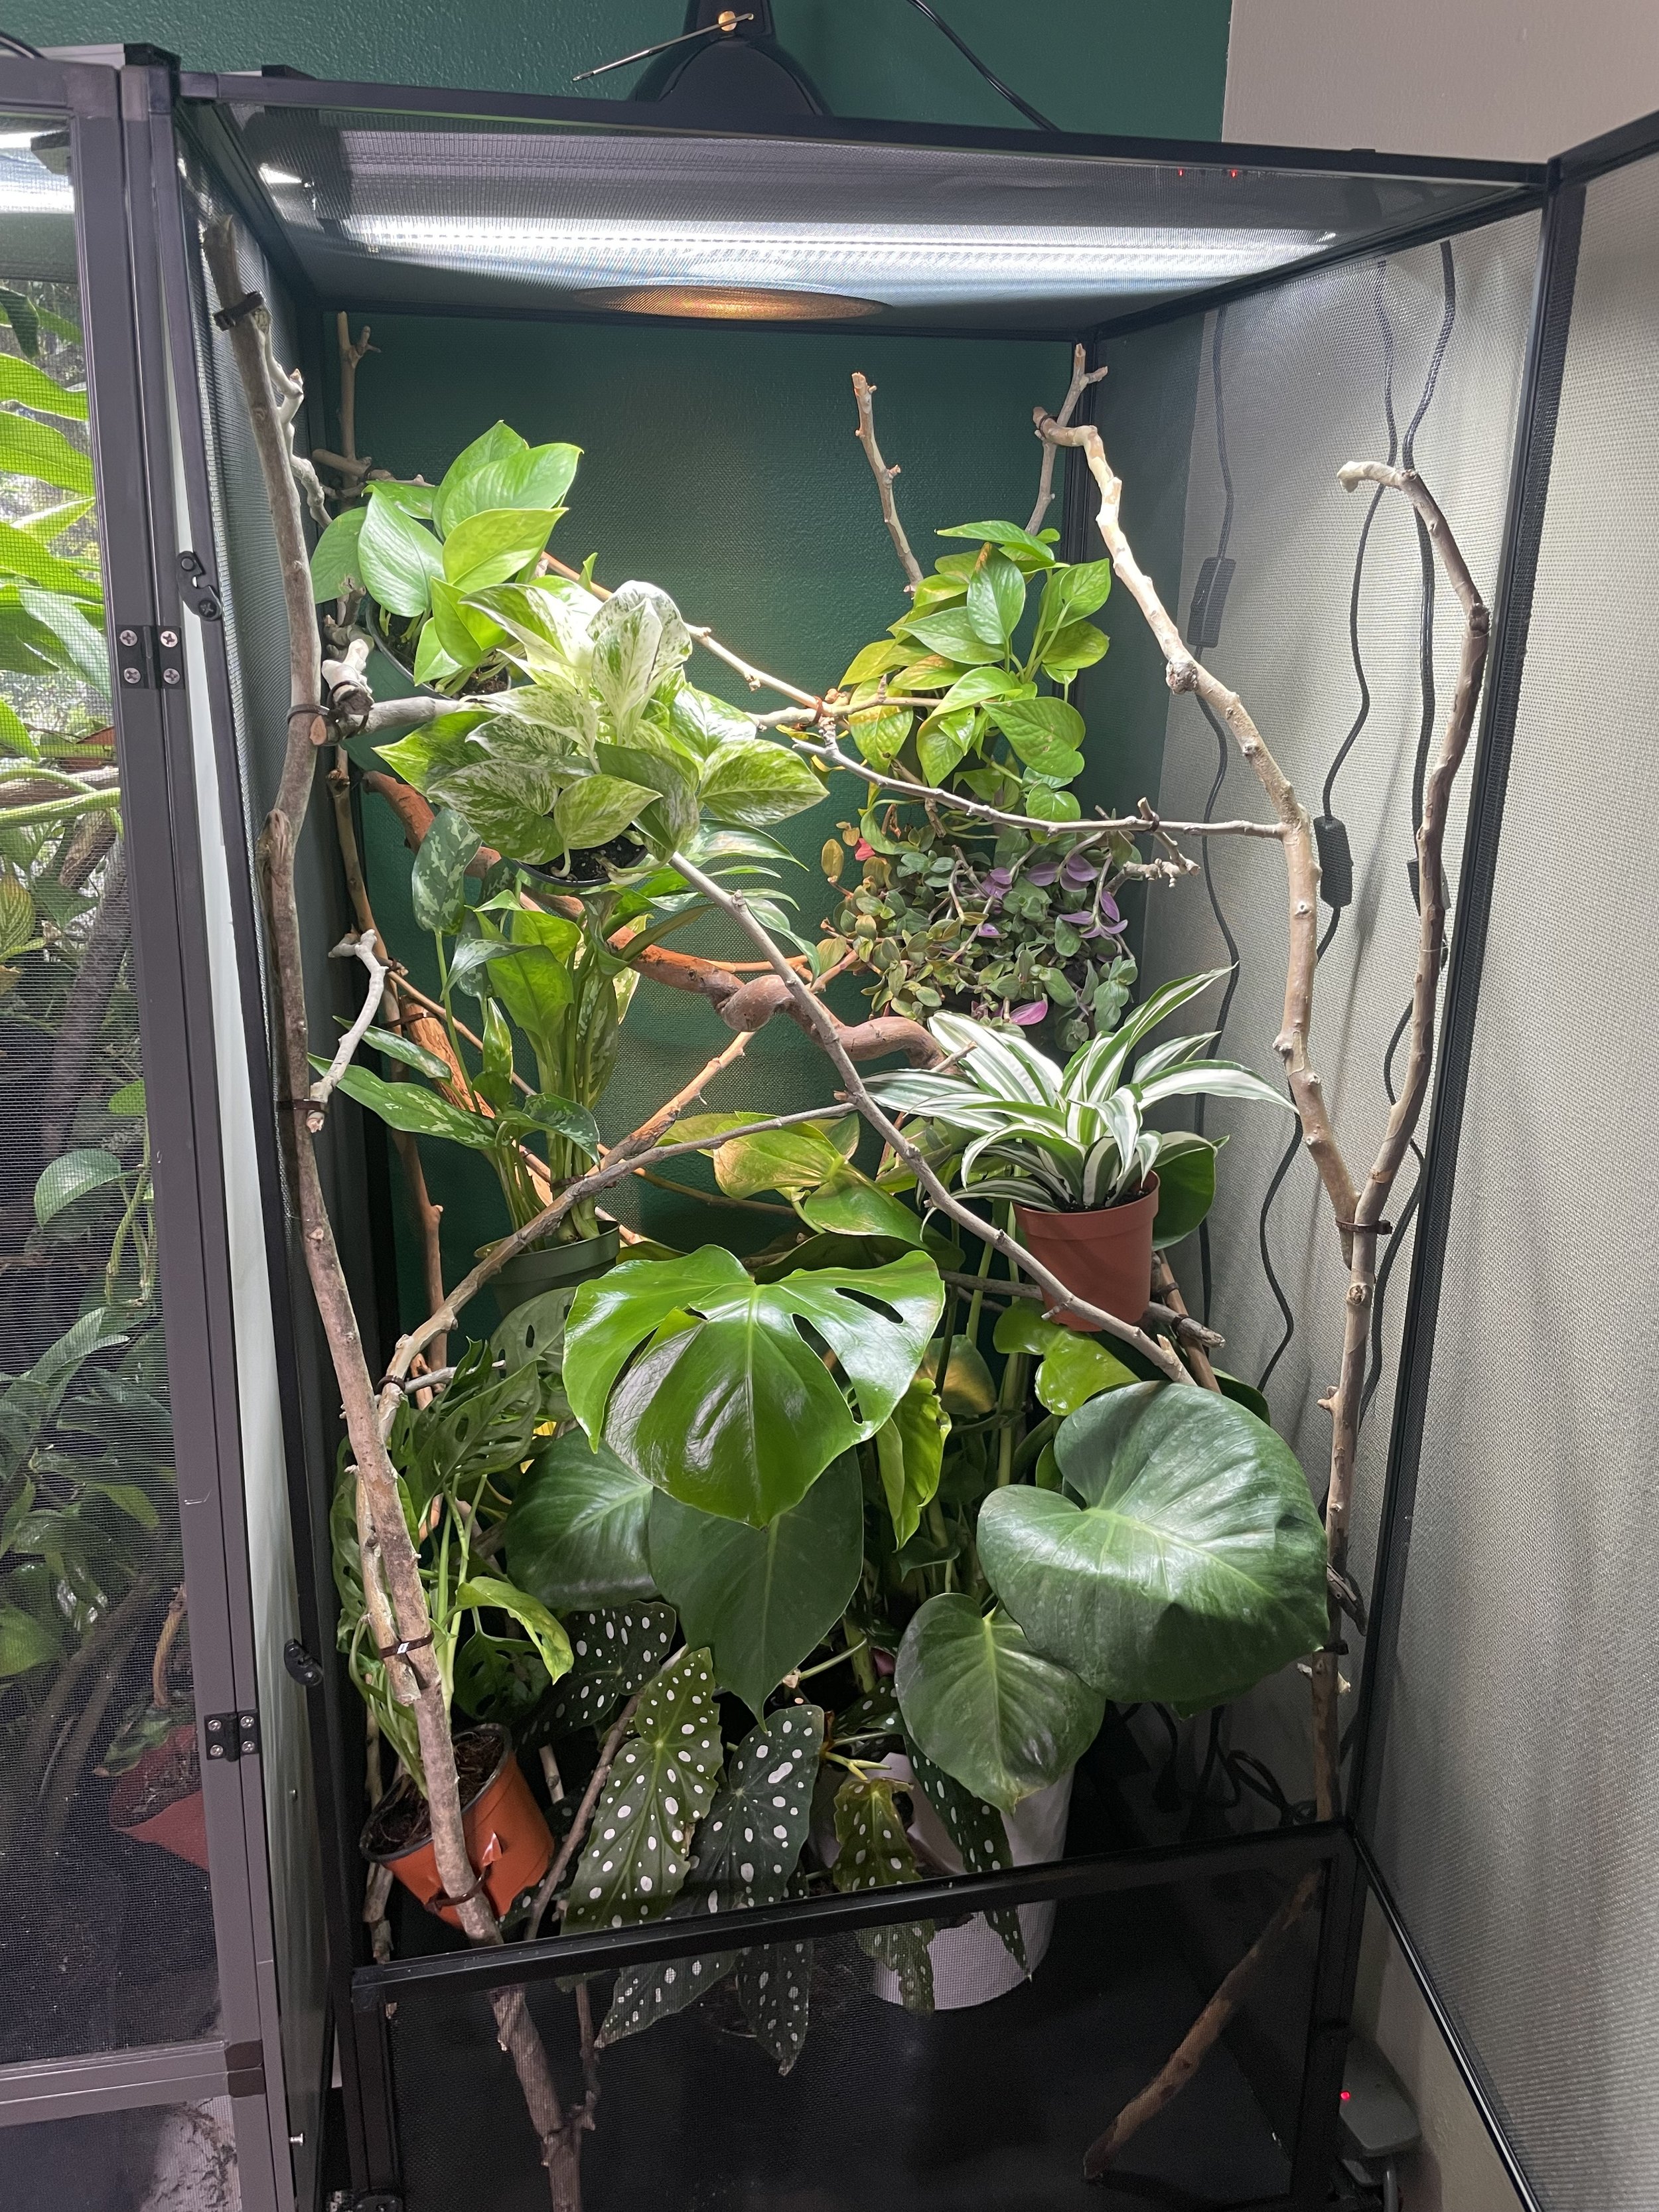
The enclosure in the picture was set up using just fishing line and zip ties! I’m going to show you how I did it. If you’d prefer to chat one-on-one with me and have me give you custom advice, book a call!
Golden Rule: Any empty space is unusable space
Chameleons are climbers so if there is any empty space, they can’t use it. Take a step back while you’re attaching your branches and plants and look for any empty spaces and fill them in. It should be hard to find your chameleon. They should have lots of places to hide and feel safe.
Branches
The branches you put inside of the chameleon enclosure have multiple purposes. The branches are used for traveling around the enclosure, enabling proper thermoregulation, ensuring your chameleon is comfortable, holding up other décor and foliage, and also general aesthetics. Use sticks and branches to your advantage to make an awesome display but also to keep your chameleon comfortable.
The first purpose of installing branches in your enclosure is to provide your chameleon pathways and highways to safely travel through the enclosure. Without a proper branch setup, it is likely your chameleon will try to climb the screen which could cause them to fall and rip out their nails. Chameleons typically move side-to-side so I would try to place your branches horizontal with a few running diagonally along the top, middle, and bottom. The branches are how your chameleon will get around, so any empty space is unused space. Every enclosure will be different but just so you have an idea, I ended up using 25 branches in the enclosure pictured above.
What branches do I use?
Most chameleon keepers locally source their branches. I personally use natural branches from outside and have had great success using birch wood but there’s lots of different kinds you can use. If you do decide to use natural branches from outside be sure they are washed and cleaned to avoid bringing any foreign contaminants into your enclosure. If you are looking to buy branches The Bio Dude now offers 42” birch branches in packs of 10!
Make sure the branches you pick are not too thick. Your chameleon’s foot should be able to grip around the branch. It’s always a good idea to provide a variety of sizes of branches to give your chameleon lots of options. Avoid using bamboo because it is very slick and can be difficult for your chameleon to climb. Also avoid branches from pine trees, sap producing trees (the sap may cause irritation or physical impairment), and fake bendy and or mossy vines where a wire may poke out of the vine.
How do I attach the branches?
Supplies you’ll need:
Approximately 25 branches
Fishing line
Zip ties (I use brown ones so they blend in better)
Step 1: Attach your anchor branches
You’ll want to attach 4 long branches in all 4 corners of your enclosure along the metal frame. These will be your weight bearing anchor branches. I use fishing line to tie the branches to the screen but other people have used things like floral wire.
Step 2: Attach your basking branch
The most important branch in your enclosure is your basking branch which is the one that will be underneath the heat bulb. It is SUPER important that this is the appropriate distance providing the correct temperatures so your chameleon will not burn themselves because chameleons are unable to recognize if the temperature is too hot and will accidentally burn themselves causing irreversible damage. If you have a baby chameleon, you will need to factor in the growth of your chameleon and adjust the branches as needed because they will get closer to the heat bulb as they grow. I recommend basking branch placement typically 4"-6” away from the basking bulb.

Step 3: Attach your highway branches
These are the branches your chameleon will use to climb throughout their enclosure. You should place them in a variety of directions and in the top, middle, and bottom. Make sure these aren’t too thick and that your chameleon will be able to grip it with their tiny foot. I use two zip ties, one on each side, to attach the branches to the anchor branches and then I can start attaching the highway branches to each other.
Step 4: Attach your filler branches
Now that you’ve put in the majority of your branches take a step back and look for any places you could put in smaller branches. Remember the golden rule!
Plants
The plants inside of the enclosure give your chameleon additional things to climb on as well as places to hide. If you are looking for ideas on what plants to use for your chameleon’s enclosure, check out the safe plants to use page.
It is important to make sure you are using live plants that are safe for your chameleon since some chameleons, especially veiled chameleons, will eat the live plants which is why fake plants are not recommended for most chameleons. Avoid using fake plants, ropes, or hammocks, and really anything besides natural branches and live plants because they have been known to cause preventable issues with chameleons.
When building your enclosure, I would suggest starting at the top and working your way down when adding in your plants. Use smaller plants that do well in heat, high light, and with lots of water towards the top and then use bigger, more sturdy plants that do well in low light for the bottom of the enclosure. Remember any empty space, is unused space. A good rule of thumb is to you should be able to sit across the room and have a hard time spotting your chameleon. They need lot of plant coverage to be able to hide and feel secure. I ended up using 8 smaller plants attached to the upper branches and 3 big potted plants at the bottom in the enclosure shown above.
How to attach plants
Full tutorial video:
Step 1: Cut two slits into the plastic pot
Step 2: Run a zip tie through the two slits
Step 3: Zip tie plant to branch
Pro tip: If you follow the same steps as above with an empty pot, then you can easily swap the plants in and out from the attached pot. Commonly referred to as the “double pot method”.